Tile roof installation requires precision and adherence to guidelines for durability and safety. This guide covers essential steps, tools, and best practices for a successful project.
1.1 Overview of Tile Roofing Benefits
Tile roofing offers durability, fire resistance, and aesthetic appeal, making it a popular choice. It provides excellent weather protection, reduces noise, and enhances energy efficiency. With proper installation, tile roofs can last decades, requiring minimal maintenance. Their versatility suits various architectural styles, and they are environmentally friendly, often made from sustainable materials like clay and concrete.
1.2 Importance of Proper Installation
Proper installation ensures structural integrity, preventing leaks and damage. It extends the roof’s lifespan, reduces maintenance costs, and enhances safety. Correct techniques also guarantee manufacturer warranty compliance, providing long-term durability and weather resistance. Improper installation can lead to costly repairs and compromise the roof’s performance, making adherence to guidelines essential for a secure and reliable roofing system.

Preparation and Planning
Proper preparation ensures a stable base for tile installation. Assess roof structure and load capacity, measure the area accurately, and plan for proper design and detailing to avoid issues.
2.1 Assessing Roof Structure and Load Capacity
Assessing the roof structure ensures it can support the weight of tile roofing. Evaluate load capacity, considering regional factors like high winds or snow. Proper design and materials ensure safety and durability, adhering to guidelines from the Tile Roofing Institute and local building codes for a secure installation.
2.2 Measuring the Roof Area for Tile Placement
Accurate measurement of the roof area is critical for tile placement. Measure length and width, calculating total area to determine tile quantity. Ridge tiles and valleys require precise alignment, ensuring proper fit and structural integrity. Follow manufacturer guidelines for spacing and alignment to achieve a seamless installation.

Tools and Materials Required
Essential tools include tile cutters, drills, and hammers. Materials like underlayment, battens, and sealants ensure durability. Follow manufacturer recommendations for quality and compatibility.
3.1 Essential Tools for Tile Roof Installation
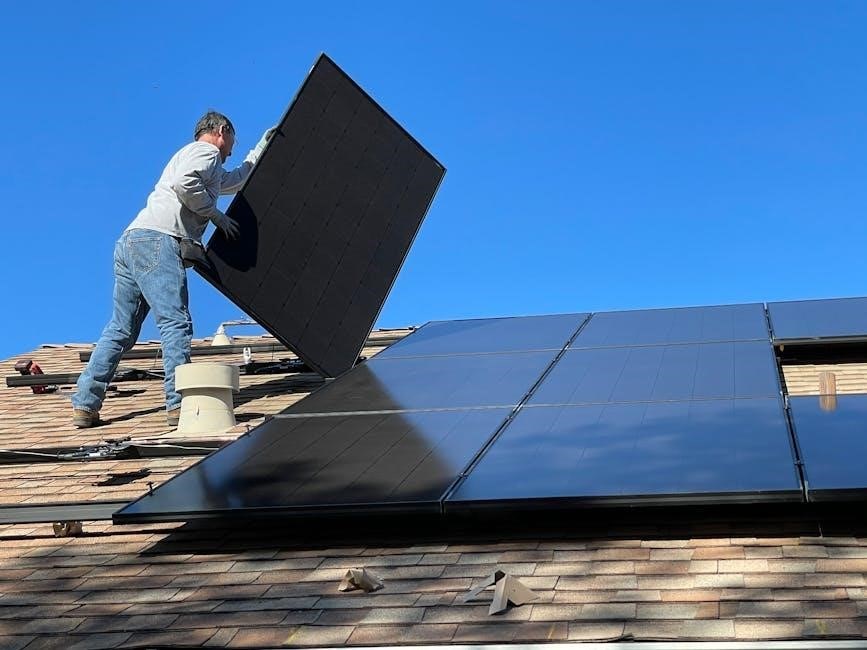
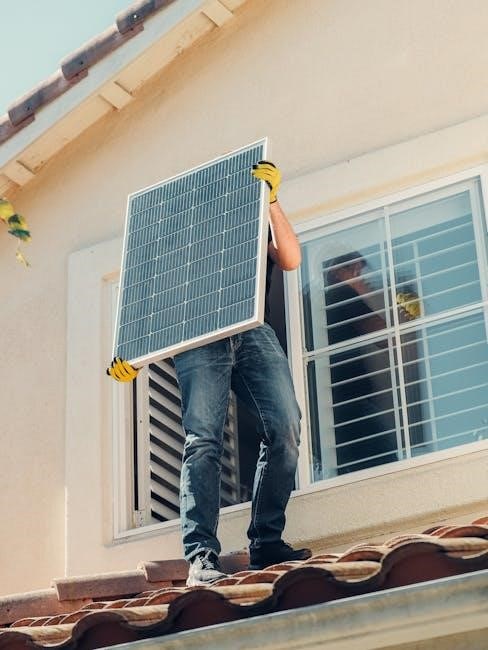
The installation process requires specific tools like tile cutters for precise cuts, impact drills for secure fastening, and rubber mallets to avoid tile damage. Additionally, ladders, safety harnesses, and measuring tapes are crucial for safe and accurate work. These tools ensure efficiency and quality in the installation process, adhering to professional standards.
3.2 Recommended Materials and Accessories
High-quality clay or concrete tiles are fundamental, offering durability and weather resistance. Underlayment materials like waterproof membranes ensure a moisture-free base. Battens provide structural support, while roofing nails secure tiles firmly. Additional accessories include ridge caps for sealing ridges and valley tiles for water diversion, ensuring a complete and weather-tight installation.
Design and Layout Considerations
Tile roof design involves selecting styles, colors, and layouts that complement the structure. Proper pitch and spacing ensure functionality and aesthetics, while overhangs protect walls from weather damage.
4.1 Choosing the Right Tile Style and Color
Selecting the appropriate tile style and color enhances both aesthetic appeal and durability. Consider architectural design, climate conditions, and personal preference. Ensure color consistency with surrounding structures for a cohesive look. Proper tile material choice also impacts weather resistance and longevity, making it a critical decision in the design phase.
4.2 Planning Roof Overhangs and Pitch
Planning roof overhangs and pitch is crucial for optimal weather protection and structural integrity. The overhang protects walls from rain, while the pitch ensures proper drainage. Factors like climate, tile type, and local codes influence design. Proper gauge and overlap ensure durability. A well-designed pitch enhances aesthetic and structural compatibility.
4.3 Considering Spacing and Alignment
Proper spacing and alignment are critical for a durable and visually appealing tile roof. Factors like tile type, design, and manufacturer guidelines influence spacing. Use chalk lines and battens to ensure alignment. Improper spacing can lead to leaks or structural issues, making precise measurements and adjustments essential during installation.

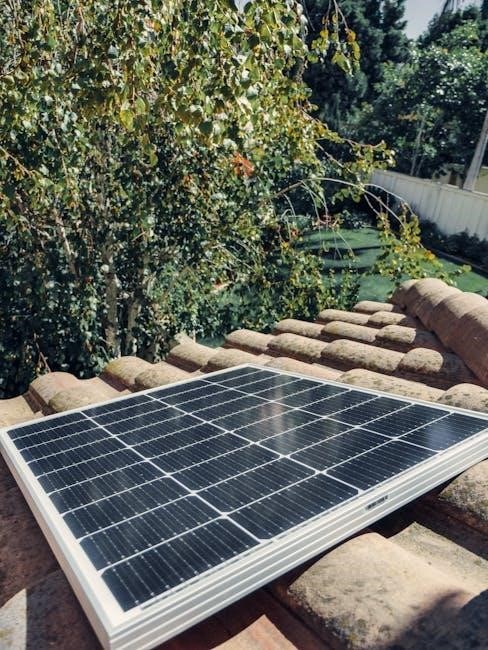
Step-by-Step Installation Process
A detailed guide outlines preparing the roof surface, laying underlayment, and installing tiles. Ensure proper alignment and weather tightness by following manufacturer guidelines and best practices.
5.1 Preparing the Roof Surface
Begin by cleaning the roof surface, removing old roofing material, and inspecting for damage or rot. Secure any loose boards or nails. Ensure the surface is level, dry, and free from debris. Apply a new underlayment if necessary, following local building codes and manufacturer guidelines. This step ensures a stable base for tile installation.
5.2 Laying Battens and Underlayment
Install battens horizontally, spaced according to tile size and manufacturer guidelines. Ensure battens are aligned with the roof pitch and securely fastened. Next, lay underlayment material, such as roofing felt, over the entire surface, overlapping edges by at least 6 inches. Secure with staples or nails, ensuring a tight, even surface for tile placement. Follow local codes.
5.3 Installing Ridge, Eaves, and Valley Tiles
Begin by installing eaves tiles along the roof edges, ensuring alignment with the gutter system. Valley tiles are placed where two roof slopes meet, securing with underlayment and sealants. Ridge tiles are added at the peak, overlapping field tiles by at least 75mm. Use weatherproof sealants and follow manufacturer instructions for secure fastening and alignment.
5.4 Placing Field Tiles and Ensuring Proper Fit
Start by aligning field tiles with chalk lines, ensuring even spacing. Secure each tile to battens, checking for proper fit and alignment. Overlap tiles by at least 75mm at joints. Use sealants to weatherproof gaps. Ensure tiles are firmly fastened to withstand environmental conditions, following manufacturer guidelines for secure installation and long-term durability.
Ventilation and Weatherproofing
Proper ventilation ensures airflow, preventing moisture buildup. Install ventilation systems and use sealants to guarantee weather tightness, adhering to manufacturer guidelines for a durable and secure roof system.
6.1 Importance of Proper Roof Ventilation
Proper roof ventilation is crucial for maintaining structural integrity and energy efficiency. It prevents moisture buildup, reduces heat in summer, and inhibits ice dams in winter, ensuring a longer-lasting roof system and a healthier indoor environment with improved air quality and reduced risk of mold growth and structural damage over time.
6.2 Installing Roof Ventilation Systems
Installing roof ventilation systems requires precision to ensure proper airflow. Ridge vents and soffit vents are commonly used, promoting air circulation and moisture removal. Ensure vents are compatible with tile roofing and made from durable materials like aluminum or PVC for longevity and weather resistance. Follow manufacturer guidelines for optimal installation and performance.
6.3 Ensuring Weather Tightness and Sealants
Ensuring weather tightness is crucial for long-lasting tile roofs. Apply high-quality sealants around edges, vents, and overlapping tiles to prevent leaks. Silicone or polyurethane-based sealants are recommended for durability. Properly secure ridge and eaves tiles with a minimum 75mm overlap. Adhere to manufacturer guidelines for sealant application to maintain weather resistance and structural integrity. Regular inspections ensure optimal performance.
Maintenance and Repair
Regular inspections and cleaning are vital for maintaining tile roofs. Promptly address damaged or loose tiles to prevent further damage and ensure longevity.
7.1 Regular Inspection and Cleaning
Regular inspections ensure early detection of issues like cracked or missing tiles. Clean debris from surfaces and gutters to maintain water flow and prevent damage. Inspect flashings and vents for leaks. Professional cleaning avoids damage from harsh chemicals or abrasive methods, ensuring tiles remain intact and functional for years to come.
7.2 Identifying and Addressing Common Issues
Common issues include cracked tiles, weather tightness problems, and ventilation inefficiencies. Inspect for damaged or loose tiles and replace them promptly. Ensure proper sealant application to maintain weather resistance. Address ventilation concerns by installing or inspecting systems to prevent moisture buildup. Regularly check valleys and chimneys for potential leaks or gaps to ensure long-term durability.
Safety Precautions
Always wear safety equipment, including harnesses and gloves, to prevent falls and injuries. Ensure proper ladder stability and use non-slip footwear for secure footing during installation.
8.1 Safety Equipment and Best Practices
Essential safety equipment includes harnesses, gloves, safety glasses, and non-slip footwear. Always maintain three points of contact on ladders and ensure proper scaffolding setup. Regularly inspect tools for damage and follow manufacturer guidelines for equipment use to minimize risks during tile roof installation.
8.2 Avoiding Common Hazards During Installation
Prevent falls by securing ladders and scaffolding. Ensure tiles are properly fastened to avoid falling debris. Use safety nets for additional protection. Regularly inspect roof structures to prevent collapses. Follow installation guidelines to avoid misalignment and weak points, ensuring a stable and secure roofing system throughout the process.
Regional and Environmental Considerations
Tile roofs must be adapted to local conditions, such as high winds, snow loads, or coastal humidity. Choose materials and designs suitable for your region to ensure durability and compliance with local building codes.
9.1 Installing Tile Roofs in High-Wind Areas
For high-wind regions, ensure tiles are securely fastened with durable adhesives and mechanical fasteners. Use reinforced underlayment and battens to enhance structural integrity. Select wind-resistant tile styles and follow local building codes for optimal performance. Regular inspections and maintenance are crucial to withstand extreme weather conditions.
9.2 Tile Roof Installation in Snow-Prone Regions
In snow-prone areas, use freeze-resistant tiles and ensure proper roof pitch for snow shedding. Reinforce underlayment and waterproofing to prevent moisture damage. Install snow guards to manage snow load and avoid ice dams. Ensure ventilation systems are clear to maintain airflow and prevent condensation buildup during cold months.
Manufacturer Guidelines and Compliance
Adhere to manufacturer instructions for tile specifications, installation methods, and material compatibility. Ensure compliance with local building codes and industry standards for safety and durability.
10.1 Adhering to Manufacturer Instructions
Always follow manufacturer guidelines for tile specifications, installation methods, and material compatibility. Refer to provided manuals for detailed instructions, ensuring compliance with recommended practices and troubleshooting common issues effectively.
10.2 Ensuring Compliance with Local Building Codes
Always verify and adhere to local building codes and regulations for tile roof installation. Obtain necessary permits and ensure compliance with structural requirements. Regular inspections by local authorities guarantee safety and durability, meeting regional standards for construction and materials.
10.3 Troubleshooting Common Manufacturer-Related Issues
Consult manufacturer guidelines to address issues like incorrect tile shipments or defective materials. Verify tile dimensions for proper fitting and ensure compatibility with roof pitch. Contact manufacturer support for replacements or adjustments. Regularly inspect tiles and underlayment for adherence to specifications, resolving issues promptly to maintain structural integrity and weatherproofing performance throughout installation.