A Dutch oven’s temperature control is crucial for even cooking, ensuring perfect roasts, bakes, and stews. This guide explores ideal temps for various techniques and tips to maintain consistency, helping you master Dutch oven cooking with precision and confidence.
1.1 Understanding the Importance of Temperature Control
Temperature control is essential for achieving consistent results in Dutch oven cooking. Proper heat management prevents overheating or underheating, ensuring even cooking and desired textures. Dutch ovens, especially cast iron ones, retain heat well, but mastering temperature is key for perfect dishes, whether roasting, baking, or slow-cooking. This skill elevates your cooking and prevents common mistakes.
1.2 Brief Overview of Dutch Oven Cooking
Dutch oven cooking offers versatility for various techniques like roasting, baking, and slow-cooking. Its thick walls and tight lid retain heat and moisture, creating a controlled environment. Ideal for both indoor and outdoor use, Dutch ovens are perfect for hearty stews, crusty bread, and tender roasts. Temperature management is key to unlocking their full potential and ensuring delicious results every time.
Factors Affecting Dutch Oven Temperature
Material, size, thickness, and heat source influence Dutch oven temperature. These factors affect heat retention and distribution, ensuring consistent cooking results when properly managed.
2.1 Material and Construction of the Dutch Oven
Dutch ovens are typically made from cast iron, enameled cast iron, or ceramic materials. Cast iron offers excellent heat retention, while enameled versions add durability and rust resistance. Ceramic models, like Emile Henry, provide even heat distribution and moisture retention. The thickness of the pot significantly impacts temperature control, with thicker models holding heat longer and distributing it more evenly for consistent cooking results.
2.2 Size and Thickness of the Pot
The size and thickness of a Dutch oven significantly impact temperature control. Thicker pots retain heat longer and distribute it more evenly, ideal for slow cooking. Larger ovens require more heat to maintain consistent temperatures, especially for outdoor cooking. The right size ensures efficient heat management, preventing hotspots and undercooked areas, while thickness enhances thermal retention for uniform cooking results.
2.3 Heat Source and Cooking Environment
The heat source and cooking environment greatly influence Dutch oven temperatures. Campfires, stovetops, and ovens require different heat management techniques. Outdoor cooking demands adjusting coals or flame placement to maintain even heat. Wind and weather conditions can disrupt temperature consistency, while indoor settings offer more control. Understanding these factors ensures precise temperature regulation for optimal cooking results in any setting.
Dutch Oven Temperature for Specific Cooking Techniques
Dutch oven temperatures vary by technique: 300-400°F for roasting, 275-325°F for slow cooking, and 450-500°F for searing. Understanding these ranges ensures perfect results for every dish.
3.1 Roasting and Baking
For roasting and baking in a Dutch oven, ideal temperatures range from 300°F to 400°F. Preheating ensures even heat distribution, while the lid traps steam, enhancing browning and moisture retention. Perfect for dishes like pot roast or crusty bread, this method requires precise temperature control to achieve tender, flavorful results with a golden crust.
3.2 Slow Cooking and Stewing
Slow cooking and stewing thrive at lower temperatures, typically between 250°F and 300°F. This method allows tough cuts of meat to tenderize over time, infusing rich flavors. Dutch ovens excel at maintaining consistent heat, ensuring tender, flavorful dishes like stews and braises with minimal effort, perfect for hearty, comforting meals.
3.3 Searing and Browning
Searing and browning in a Dutch oven typically require high temperatures, around 300-400°F, to achieve a flavorful crust. This process enhances both texture and taste, especially for meats. Using the right oil and avoiding overcrowding ensures even browning, preventing pieces from steaming instead of searing. Proper technique here is key to a rich, caramelized finish that elevates your dishes.

Dutch Oven Temperature Chart
A Dutch oven temperature chart provides ideal heat ranges for various dishes, from 300°F for slow cooking to 450°F for baking bread, ensuring precise control.
4.1 Ideal Temperatures for Common Dishes
For roasts and stews, maintain 300-350°F. Baking bread requires 425-450°F for a crispy crust. Searing meats needs 400-450°F, while slow cooking stays at 275-300°F. Adjusting heat ensures tender, flavorful results across various recipes, optimizing both texture and taste.
4.2 Adjusting Heat for Outdoor vs. Indoor Cooking
Outdoor cooking requires adjusting for wind and heat loss, often using coals for even distribution. Indoors, maintain steady temperatures with precise oven control. Campfires may need more coal for higher temps, while indoor ovens rely on thermostat accuracy. Adjusting heat sources ensures consistent cooking, whether in a controlled kitchen or open campsite environment.
Maintaining Consistent Temperature
Maintaining consistent temperature is key for Dutch oven cooking. Use thermometers to monitor heat and adjust coals or stove settings for steady cooking conditions always.
5.1 Managing Heat Distribution
Managing heat distribution in a Dutch oven ensures even cooking. Rotate the pot periodically to avoid hotspots, especially when using coals. Placing coals evenly around the lid and base helps maintain consistent heat. For stovetop use, adjust burner heat and monitor the flame size to prevent uneven temperature fluctuations during cooking.
5.2 Monitoring Temperature with Thermometers
Using an oven-safe digital thermometer ensures precise temperature monitoring. Place the probe inside the pot, avoiding direct contact with the base or sides. Regularly check the reading to maintain consistent heat, especially during long cooks. This tool is essential for preventing overheating and underheating, ensuring your dishes are perfectly cooked every time.
Common Mistakes in Temperature Regulation

Avoid overheating and underheating by closely monitoring your Dutch oven’s temperature. These common mistakes can ruin dishes, so ensure consistent heat for perfect results every time.
6.1 Overheating and Underheating
Overheating can burn dishes, while underheating may leave them undercooked. Monitoring temperature is key to avoiding these issues. Use thermometers to track internal and pot temperatures, ensuring even cooking. Adjust heat sources as needed to maintain consistent temps, especially for long-cooking recipes like stews or roasts. Preventing extreme temperature fluctuations ensures better results and texture in Dutch oven cooking.
6.2 Incorrect Placement of Heat Sources
Misplacing heat sources can lead to uneven cooking. Too many coals under the pot or too few around the lid disrupts heat distribution. Always ensure balanced placement to avoid hotspots. Regularly check and adjust coal positions to maintain consistent temperatures, preventing undercooked or burnt areas in your dishes.
Dutch Oven Temperature Guide for Camping
Camping Dutch oven cooking requires managing campfire heat effectively. Use coals to control temperature, adjusting their placement and number to maintain consistent heat. Monitor closely to avoid overheating or undercooking, ensuring a perfectly cooked meal in the great outdoors.
7.1 Campfire Temperature Management
Managing heat over a campfire requires careful coal placement. Arrange coals around the Dutch oven to distribute heat evenly, ensuring consistent temperatures. Adjust the number of coals based on the recipe and wind conditions to maintain optimal heat levels. Monitoring the temperature regularly helps prevent overheating or undercooking, ensuring a perfectly cooked meal outdoors.
7.2 Using Coals for Even Heat Distribution
Coals are key to achieving even heat in Dutch oven cooking. By arranging coals around the pot and on the lid, heat circulates uniformly. This setup mimics an oven, allowing for consistent cooking temperatures. Adjusting coal placement and quantity ensures optimal heat distribution, making it ideal for camping and outdoor cooking scenarios where traditional ovens aren’t available. Perfect for slow cooking and baking alike.
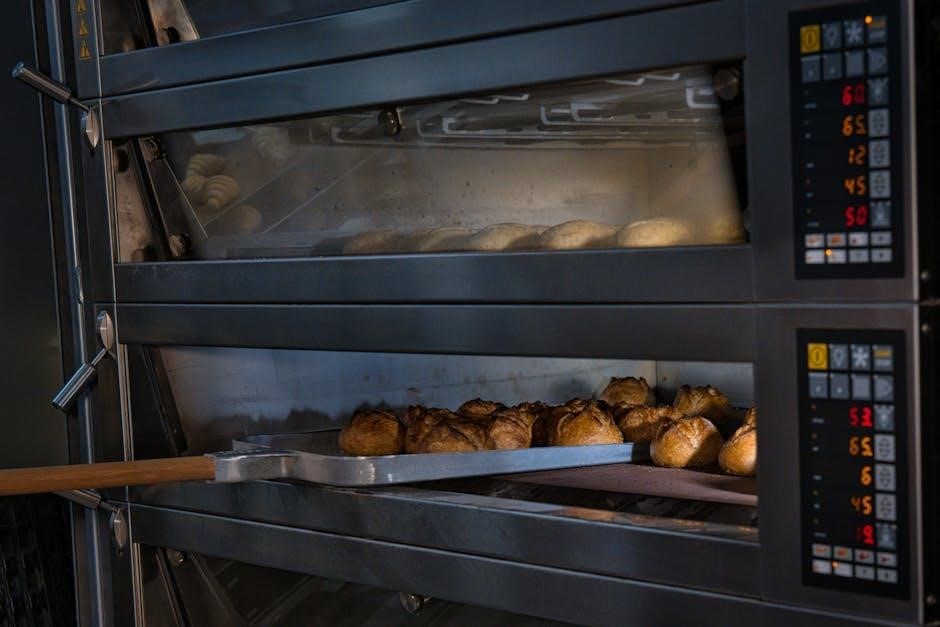
Dutch Oven Temperature Guide for Bread Baking
Bread baking in a Dutch oven requires a steamy, consistent environment. Preheat the pot to 450-500°F for a crispy crust. Ideal for sourdough and crusty bread recipes.
8.1 Creating a Steamy Environment
Creating a steamy environment in a Dutch oven is essential for bread baking. Preheat the pot to 450-500°F, then add water or ice to generate steam. This method ensures a moist atmosphere, promoting dough rise and a golden, crispy crust. Ideal for sourdough and crusty bread, steam enhances flavor and texture, making it a crucial step in achieving professional results at home.
8.2 Achieving the Perfect Crust
Achieving the perfect crust in Dutch oven bread baking requires preheating the pot to 450-500°F. Place dough inside, score it for even expansion, and bake for 25-35 minutes. The enclosed environment promotes even browning and a crispy, caramelized crust. Using a preheated pot and proper flour ensures a golden, professional-quality finish, ideal for sourdough and artisan breads.
Dutch Oven Temperature Guide for Sourdough
For sourdough, preheat your Dutch oven to 450-500°F. This creates a steamy environment, promoting even rise and crust development. Monitor temperature closely during fermentation and baking to ensure optimal results.
9.1 Understanding Dough Fermentation
Dough fermentation is a critical process in sourdough baking, requiring precise temperature control. A Dutch oven provides a stable environment, with temperatures between 75-80°F ideal for fermentation. This range encourages yeast activity, leading to a light, airy texture. Monitoring temperature ensures the dough develops properly without over-proofing, which can result in a dense loaf. Consistency is key for achieving the perfect rise and flavor.
9.2 Baking in a Preheated Dutch Oven
Preheating a Dutch oven ensures even heat distribution, essential for sourdough baking. Heat the oven to 500°F (260°C) for 30 minutes before baking. Gently place the dough inside, cover, and bake for 20-25 minutes. The enclosed environment traps steam, promoting a crisp crust and even rise. Remove the lid for the last 5 minutes to brown the top, achieving a professional finish at home.
Dutch Oven Temperature Guide for Outdoor Cooking
Outdoor Dutch oven cooking requires adjusting for wind, weather, and altitude. Use coals for consistent heat, ensuring even distribution, and monitor temperature closely to adapt to environmental changes.
10.1 Wind and Weather Effects on Heat
Wind and weather significantly impact Dutch oven temperature control outdoors. Strong winds can disrupt heat distribution, while cold or damp conditions may require additional coals to maintain desired temperatures. Always monitor the oven’s temperature and adjust coal placement or lid positioning to compensate for environmental factors, ensuring consistent cooking results despite unpredictable outdoor conditions.
10.2 Adjusting for High-Altitude Cooking
High-altitude cooking requires adjustments due to lower air pressure and humidity. Increase Dutch oven temperature slightly to compensate for slower cooking times. Covering the oven can help retain moisture, countering dry high-altitude conditions. Monitor temperature closely with thermometers to ensure even heat distribution and adjust as needed for consistent results in high-altitude environments.

Dutch Oven Temperature Guide for Beginners
Start with simple recipes and monitor temperatures closely. Begin at 350°F for most dishes, adjusting heat sources as needed. Experiment with new recipes confidently, ensuring consistent results while mastering Dutch oven cooking basics.
11.1 Starting with Simple Recipes
Begin with straightforward dishes like one-pot meals or casseroles to build confidence. Start at 350°F for most recipes, adjusting as needed. Focus on monitoring heat and maintaining consistent temperatures. Simple bread recipes or roasts are ideal for learning. Keep it basic to avoid overwhelm and ensure success in your early Dutch oven cooking experiences.
11.2 Avoiding Common Temperature-Related Mistakes
Common errors include overheating, which can burn dishes, and underheating, leading to raw or undercooked meals. Use thermometers to monitor temps accurately. Prevent hotspots by rotating the pot and adjusting coals or stove heat. Keep lids tight to retain heat. Consistency is key, so avoid frequent lid lifting and ensure even heat distribution for perfect results.
Mastering Dutch oven temperature control enhances cooking consistency and quality. By following this guide, you’ll achieve perfect results and confidently experiment with new recipes and techniques.
12.1 Mastering Dutch Oven Temperature Control
Consistent heat is key to successful Dutch oven cooking. Use thermometers to monitor temperatures, adjust coals for even distribution, and preheat properly. For outdoor cooking, manage wind and coals to maintain steady heat. Regularly check and adjust heat sources to prevent overheating or underheating. This ensures perfectly cooked dishes every time, whether roasting, baking, or slow-cooking.
12.2 Experimenting with New Recipes
Expand your culinary horizons by exploring diverse recipes tailored for Dutch ovens. From hearty stews to crusty sourdough bread, the right temperature ensures success. Experiment with baking, roasting, or slow-cooking, adjusting heat sources as needed. Whether camping or cooking at home, this versatile pot invites creativity, allowing you to craft delicious, memorable dishes with precision and flair.