Safety Precautions
Always unplug the machine after use and before cleaning or maintaining it. Never leave the sewing machine unattended while plugged in. Wear protective gear like gloves and safety glasses when operating. Keep the work area clean and free from flammable materials. Avoid sewing near water or in humid environments. Regularly inspect the machine for damage and ensure all parts are securely tightened before use. Follow the manual’s guidelines for oiling and maintenance to prevent mechanical failure.
1.1 General Safety Guidelines
Always use the sewing machine for its intended purpose, as described in the manual. Keep children and pets away while operating the machine. Unplug it immediately after use and before cleaning. Never modify or tamper with the machine’s components. Avoid sewing near water or in humid environments. Ensure the workspace is well-ventilated and free from flammable materials. Regularly inspect the machine for damage or wear. Follow all safety instructions provided in the manual to ensure safe and efficient operation. Proper maintenance, as outlined, is crucial to prevent mechanical failure and potential hazards.
1.2 Electrical Safety
Always unplug the sewing machine when not in use or during maintenance. Avoid using damaged power cords or plugs, as they can cause electric shock. Never expose the machine to water or operate it in humid conditions. Ensure proper grounding of the machine to prevent electrical hazards. Use only the power supply specified in the manual. Avoid overloading circuits with multiple high-power devices. Regularly inspect electrical components for wear or damage. If unsure about any electrical aspect, consult a qualified technician. Follow all safety guidelines to protect against fire or electrical shock risks. Proper precautions ensure safe and reliable operation.
1.3 Maintenance Safety
Always switch off and unplug the sewing machine before performing any maintenance. Use the correct tools provided or recommended in the manual to avoid damaging the machine. Never attempt to repair or adjust internal components without proper knowledge. Keep loose clothing and long hair tied back to prevent accidental entanglement. Avoid using flammable cleaning products near electrical parts. Regularly inspect belts and cables for wear and replace them if damaged. Ensure the machine is stable and secure before starting maintenance. Follow the manual’s guidelines for oiling and lubrication to maintain optimal performance.
Unboxing and Initial Setup
Carefully unpack the sewing machine, power cord, foot control, and included accessories. Place the machine on a stable, flat surface. Plug in the power cord and familiarize yourself with the controls. Read the manual thoroughly before first use to ensure proper setup and operation.
2.1 Items Included in the Box
The Husqvarna sewing machine box includes the main unit, power cord, foot control, and a variety of accessories. These accessories may include multiple presser feet for different stitching tasks, such as zigzag, blind hem, and zipper feet. Additional items like a bobbin case, extra bobbins, and a pack of needles are typically provided. A small screwdriver for machine adjustments and a brush for cleaning may also be enclosed. Always verify the contents against the manual to ensure nothing is missing. This comprehensive setup ensures you’re ready to start sewing immediately.
2.2 First-Time Setup Instructions
Begin by carefully unpacking the sewing machine and accessories. Place the machine on a stable, flat surface. Plug in the power cord and ensure the foot control is connected. Before use, inspect the machine for any damage or loose parts. Check that the needle is properly installed and the presser foot is lowered. Familiarize yourself with the control panel and stitch selections. Wind a bobbin and thread the machine according to the manual’s instructions. Test the machine by sewing on scrap fabric to ensure proper function. This setup ensures a smooth start to your sewing experience.
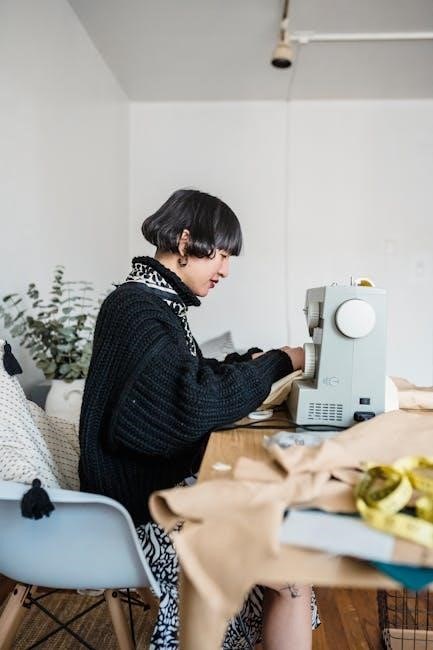
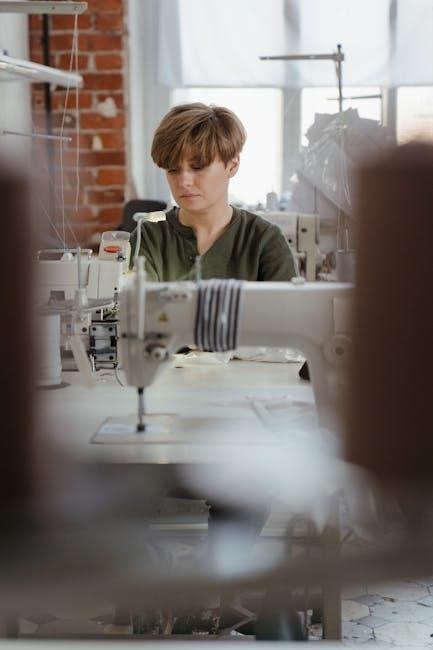
Operating the Sewing Machine
Turn on the machine using the power switch. Gently press the foot pedal to start sewing. Select the desired stitch type using the control panel. Place fabric under the presser foot and begin. Always refer to the manual for specific guidance.
3.1 Basic Operations
Place the fabric under the presser foot, aligning the edge with the guide. Gently press the foot pedal to start sewing at a steady speed. Use the handwheel to manually position the needle if needed. Select the desired stitch type using the control panel or dial, depending on your machine model. Keep the fabric moving smoothly and evenly, avoiding pulling or stretching. Use the reverse stitch button to secure the beginning and end of your seam. Always start with a test stitch on scrap fabric to ensure proper tension and stitch alignment.
3.2 Advanced Features
Explore programmable stitches and customizable settings for precise control over your sewing projects. Use the automatic needle threader to save time and effort. Engage the embroidery mode for intricate designs, guided by the machine’s built-in patterns or imported designs via USB. Adjust stitch length, width, and density using the LCD screen or control panel. Utilize the knee lifter for hands-free fabric management and the automatic backstitch function for secure seams. Experiment with advanced techniques like quilting, appliqué, or decorative stitching for professional results. These features enhance creativity and efficiency, making complex projects achievable with ease.
3.3 Troubleshooting Common Issues
If the machine stops operating, check for tangled threads or blockages. Ensure the bobbin is correctly seated and thread tension is balanced. For uneven stitching, verify stitch length and width settings or adjust fabric placement. If the needle breaks, turn off the machine and replace it with a compatible needle type. Lubricate moving parts if the machine feels stiff. Consult the manual for specific error codes or unusual noises, such as grinding or clicking, which may indicate misalignment or worn parts. Regular maintenance and proper thread setup can prevent many common issues.
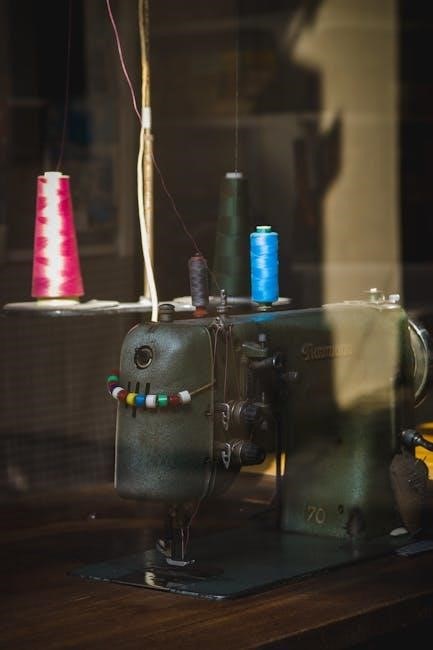
Threading and Winding
Proper threading and bobbin winding are essential for smooth operation. Always thread the machine with the presser foot raised and ensure the bobbin is correctly seated. Align fabric evenly before sewing. Refer to the manual for specific thread tension adjustments. Use high-quality thread to prevent tangles and knots.
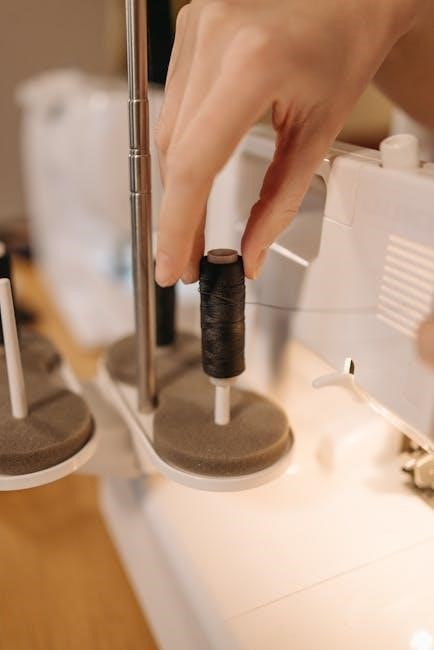
4.1 Threading the Machine
To thread the Husqvarna sewing machine, start by raising the presser foot. Locate the spool pin and guide the thread through the tension discs; Follow the thread path indicated on the machine, ensuring it passes through all guides smoothly. Insert the thread into the needle’s eye from the front. Gently pull the thread to remove any slack. For the bobbin, place it in the bobbin case and thread it through the case’s slot. Pull the thread to seat the bobbin correctly. Always use high-quality thread to avoid tangles and ensure proper stitch formation.
4.2 Winding the Bobbin
To wind the bobbin, place an empty bobbin on the bobbin winder. Pull the thread from the spool and pass it through the bobbin winder’s guide. Hold the thread end and press the foot pedal to start winding. The machine will stop automatically when the bobbin is full. Trim the excess thread close to the bobbin. Remove the bobbin and insert it into the bobbin case, ensuring it seats properly. Always use the correct type of thread for your fabric to maintain consistent tension. Avoid overfilling the bobbin, as this can cause sewing issues.
Maintenance and Care
Regularly oil moving parts to ensure smooth operation. Clean dust from the interior to prevent mechanical issues. Inspect and replace worn parts promptly. Store the machine in a dry, cool place to maintain performance.
5.1 Routine Maintenance Tasks
Regular maintenance ensures optimal performance of your Husqvarna sewing machine. Start by turning off and unplugging the machine. Use a soft brush to remove dust and lint from the interior, paying attention to the bobbin area and stitch plate. Check for loose screws and tighten them if necessary. Lubricate moving parts with a few drops of sewing machine oil, following the manual’s guidelines. Replace the needle every 8-10 hours of use to maintain accuracy. Store the machine in a dry, cool place, away from direct sunlight, to preserve its finish and functionality. Always refer to the manual for specific maintenance schedules and procedures. Regular care extends the machine’s lifespan and ensures consistent stitching quality. By following these routine tasks, you can keep your Husqvarna sewing machine in excellent working condition for years to come. Proper maintenance also prevents common issues like thread breakage and mechanical noise. Remember to clean and oil the machine after every major project to keep it running smoothly.
5.2 Oiling the Machine
Regular oiling is essential to keep your Husqvarna sewing machine running smoothly. Use only high-quality sewing machine oil, applied to the hook race and shuttle as indicated in the manual. Avoid over-oiling, as it can attract dust and dirt. Turn the handwheel gently to distribute the oil evenly. Oil the machine every 10 hours of use or when you notice the parts feeling dry. Always clean the machine thoroughly before oiling to remove lint and debris. For specific oiling points, refer to the manual’s diagram. Regular oiling prevents friction and wear on moving parts, ensuring precise stitching and longevity.
Stitch Selection and Customization
Select from various stitch types for different fabrics and techniques. Adjust stitch length and width for personalized results. Use the control panel to customize settings for precise stitching. Consult the manual for detailed customization options and optimal fabric-stitch combinations. Always test stitches on scrap fabric before sewing your final project. This ensures the desired outcome and prevents fabric waste. Regularly update your machine’s software for access to new stitch patterns and features. Proper customization enhances sewing efficiency and ensures professional-quality results. Explore advanced features for embroidery, quilting, and decorative stitching. Tailor your stitches to match your creative vision. For troubleshooting, refer to the stitch customization guide in the manual. Adjustments may vary based on fabric thickness and type. Maintain consistent tension for even stitching. Experiment with different settings to achieve unique textures and effects. Save your favorite settings for quick access in future projects. Customization options may vary depending on your machine model. Visit the Husqvarna Viking support website for model-specific customization guides. Watch tutorial videos for step-by-step instructions on advanced stitch customization. Join sewing communities to share tips and learn new techniques. Keep your machine updated with the latest software to access new customization features. Regularly clean and oil your machine to ensure smooth stitch operation. Use high-quality threads and needles suitable for your selected stitches. Always follow the manufacturer’s recommendations for stitch customization. Troubleshoot common issues like uneven stitching by checking thread tension and fabric alignment. Use the built-in help feature on your machine for guidance on stitch selection and customization. Attend workshops or online classes to master advanced stitching techniques. Customize your stitches to suit your sewing projects, from delicate fabrics to heavy-duty materials. Explore the full potential of your Husqvarna sewing machine with its versatile stitch customization options. Refer to the manual for specific instructions on accessing and adjusting stitch settings. Experiment with different combinations of stitch length, width, and density to achieve desired results. Utilize the machine’s memory function to store your favorite stitch settings for future use. Stay creative and enhance your sewing projects with personalized stitch customization.
6.1 Understanding Stitch Types
Understand the various stitch types available on your Husqvarna sewing machine, such as straight, zigzag, and decorative stitches. Each stitch serves a specific purpose, like sewing straight seams, finishing edges, or adding embroidery details. Familiarize yourself with the stitch chart in the manual to identify the best stitch for your project. Experiment with different stitch lengths and widths to achieve the desired effect. Practice on scrap fabric to see how each stitch performs. Use the machine’s built-in guide or LCD screen to select and preview stitches before sewing. This helps ensure proper fabric handling and professional results. Always refer to the manual for detailed descriptions and usage recommendations for each stitch type. By mastering the stitch options, you can enhance the quality and creativity of your sewing projects. Explore the full range of stitches to discover their unique applications and benefits. Regularly update your machine’s software to access new stitch patterns and features. Customize your stitching to suit your fabric type and sewing goals. For advanced users, explore embroidery and quilting stitches for intricate designs. Use the machine’s memory function to save your favorite stitch settings. Troubleshoot stitch issues by checking thread tension and fabric alignment. Learn to combine stitches for complex sewing tasks. Visit the Husqvarna Viking support website for tutorials and guides on stitch selection. Join sewing communities to share tips and learn new stitching techniques. Keep your machine well-maintained to ensure smooth stitch operation. Use high-quality threads and needles suitable for your selected stitches. Always follow the manufacturer’s recommendations for stitch customization. Troubleshoot common issues like uneven stitching by checking thread tension and fabric alignment. Use the built-in help feature on your machine for guidance on stitch selection and customization. Attend workshops or online classes to master advanced stitching techniques. Customize your stitches to suit your sewing projects, from delicate fabrics to heavy-duty materials. Explore the full potential of your Husqvarna sewing machine with its versatile stitch customization options. Refer to the manual for specific instructions on accessing and adjusting stitch settings. Experiment with different combinations of stitch length, width, and density to achieve desired results. Utilize the machine’s memory function to store your favorite stitch settings for future use. Stay creative and enhance your sewing projects with personalized stitch customization.
6.2 Adjusting Stitch Length and Width
Adjusting stitch length and width on your Husqvarna sewing machine allows for precise control over your sewing projects. Use the machine’s controls, such as dials or buttons, to modify these settings. Longer stitches are ideal for heavy fabrics, while shorter stitches are better for delicate materials. Similarly, wider stitches add decorative elements, while narrower stitches are suitable for straight sewing. Always test the stitch settings on scrap fabric before starting your project. Refer to the manual for specific instructions on how to adjust these settings. The LCD screen on advanced models displays real-time adjustments for accuracy. This feature ensures professional-looking results and enhances creativity in your sewing. By customizing stitch length and width, you can tailor your projects to meet specific needs. Experiment with different combinations to achieve the desired texture and appearance. Regularly update your machine’s software to access new stitch customization options; Use the machine’s built-in help feature for guidance on adjusting stitch settings. For intricate designs, combine varying stitch lengths and widths to create unique patterns. Adjustments may vary depending on the fabric type and intended use. Always refer to the manual for troubleshooting common issues related to stitch customization. By mastering stitch length and width adjustments, you can unlock the full potential of your Husqvarna sewing machine for both practical and creative sewing tasks.
Resources and Support
Accessories and Attachments
Your Husqvarna sewing machine comes with essential accessories like a sewing box, power cord, and various presser feet. Optional attachments include embroidery hoops and specialized feet for zippers or quilting. These accessories enhance functionality and versatility, allowing you to tackle diverse sewing projects efficiently. Use only genuine Husqvarna Viking parts to ensure compatibility and optimal performance. Explore the range of available attachments to expand your machine’s capabilities and achieve professional results. Accessories are available online or through authorized dealers. Always refer to the manual for attachment installation guidelines. This ensures safety and proper machine operation. By utilizing the right accessories, you can unlock your machine’s full potential for various sewing tasks. Accessories are designed to simplify sewing processes, from embroidery to heavy-duty stitching. Keep your accessories organized in the provided storage box to maintain order and accessibility. Regularly clean and maintain attachments to ensure they function optimally. For specific tasks, such as buttonholes or overlocking, use the corresponding specialized feet. Accessories are a valuable investment to enhance your sewing experience. Always purchase accessories from trusted sources to avoid compatibility issues. Use the machine’s built-in accessory guide for recommendations on which attachments to use for different fabrics and projects. Accessories are designed to adapt to your sewing needs, making your machine a versatile tool for both beginners and advanced sewists. By expanding your collection of accessories, you can explore new techniques and improve your sewing skills. Accessories are an integral part of the Husqvarna sewing machine system, ensuring you have the right tools for every task. Always store accessories in a dry, clean environment to prevent damage. Use the accessory chart in the manual to identify the correct attachment for your project. Accessories are easy to install and remove, allowing you to switch between tasks seamlessly. This flexibility makes the Husqvarna sewing machine a reliable companion for all your sewing needs. Accessories are designed with durability and precision in mind, ensuring long-lasting performance. By utilizing the full range of accessories, you can achieve professional-quality results in the comfort of your home; Accessories are a key component of the Husqvarna sewing machine experience, offering endless possibilities for creativity and productivity. Always follow the manual’s instructions when attaching or detaching accessories to avoid damaging the machine. Accessories are a smart way to upgrade your sewing capabilities without purchasing a new machine. They are cost-effective and designed to meet the evolving needs of sewists. Accessories are a testament to Husqvarna’s commitment to innovation and user satisfaction. By investing in quality accessories, you extend the life and functionality of your sewing machine. Accessories are a valuable resource for any sewing enthusiast, providing the tools needed to bring your creative visions to life. Accessories are an essential part of the Husqvarna sewing machine ecosystem, designed to enhance your sewing journey.